In my opinion, machines are meant to save wear and tear on the back, shoulders and hands. Plus allow you to get more accomplished in the same amount of time spent. Therefore, my two prefered seam finishing are meant to be done entirely on the machine, not by hand. Both of the seams below protect the seam allowance from fading, when the garment is hung to dry, turned inside out.
I believe this falls into the category of 'mock French'. The pictures on the internet for that seam look like the same idea. Take each piece of cut out pattern, turn over a thin edge, about 1/8" to 1/4", wrong side overlapping right side. Iron these down crisply. Stitch your seams as usual, but using 1/2" or so seams. Then stitch over top the two edges that are now folded, raw edges inside, in the seam. Press to one side. This makes for a bulky interior seam, like a flat fell, but it's fast, easy, and strong.
*will be adding pictures to explain*
*will be adding pictures to explain*
The other seam finish I do, I haven't found a name for it. (I'm sure there is one, no one comes up with anything new in the hive mind of humanity!) I do this one when I have barely enough fabric for my initial seam allowance, and none to spare.
You make a wide bias or grain tape, the width of your usual pressed open seam, plus .75"-1". So, for me, that's about a 1.75" tape. I tend to do something like a 1/4" to 1/2" seam allowance. For 5/8" seams, like my paper examples, it would be 2" wide. Fold over 1/8" on each side of the tape, and iron down. (I use two different widths of thin, long cardboard cut-outs to make this easier.) Fold those over again 1/4". Iron.
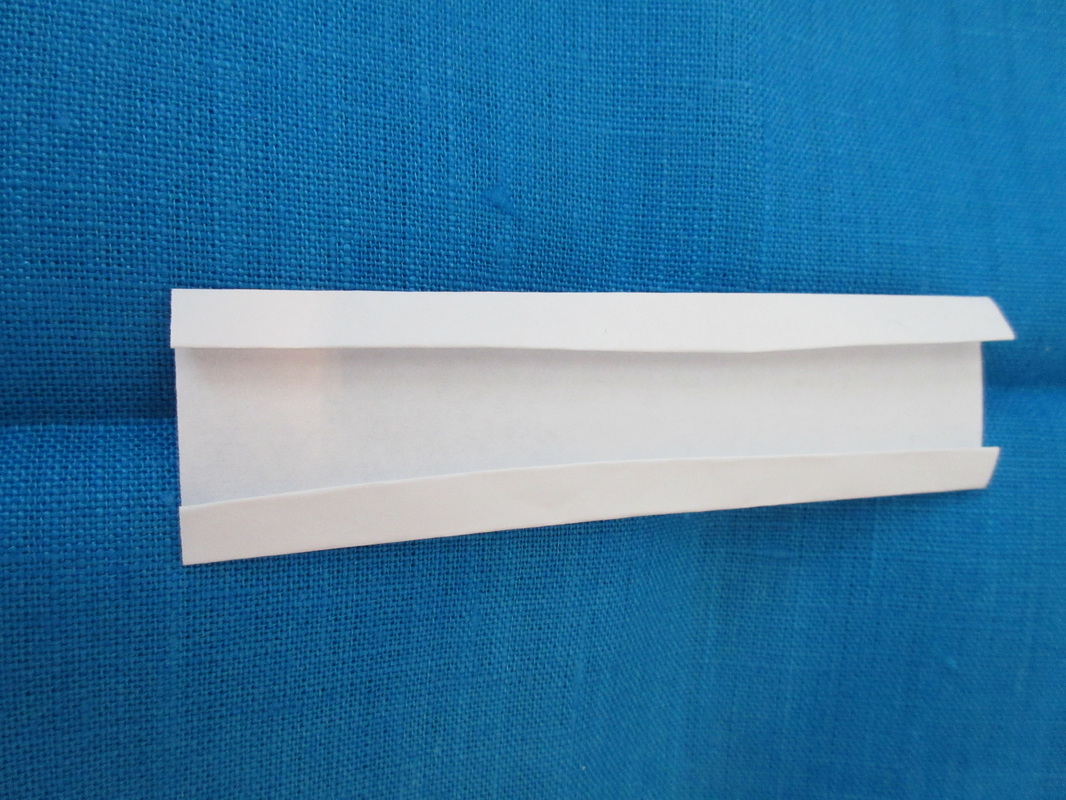
Sew, and press open your seam. With bias tape on bottom, sandwich one seam edge in one fold, and the other seam edge into the opposite fold. Pin the opposite side, and stitch down the unpinned. You can pin both, but unless I'm working with limp fabric, I haven't found this necessary. (Full disclosure, I can't find my old cardboard lengths, so I'm um, eyeballing it.) After sewing each seam edge into the tape, you can sew again down the center from the right side of the garment, right in the seam stitching. Yet again, I don't bother with this unless it's particularly limp, shifty fabric.
I've done one of these for an 1/8" seam allowance, and that was some annoyingly tight stitching; but it saved the whole project. I recommend a zipper foot, if your machine uses a wide straight stitch foot. My electric machine does, and it's really hard to see what you are doing around that massive foot.
Bias or grain tape would be decided by the type of seam. Curved, gusseted, flared seams, do a bias tape. Straight seams, grain line cut tape is fine. I never called it tape before, but that's the correct term for those lengths of seam binding bits cut from the scraps and leftover sections. It most often comes from any similar fabric type's scraps, and leftovers.
*will be adding better pictures to explain*
You make a wide bias or grain tape, the width of your usual pressed open seam, plus .75"-1". So, for me, that's about a 1.75" tape. I tend to do something like a 1/4" to 1/2" seam allowance. For 5/8" seams, like my paper examples, it would be 2" wide. Fold over 1/8" on each side of the tape, and iron down. (I use two different widths of thin, long cardboard cut-outs to make this easier.) Fold those over again 1/4". Iron.
Sew, and press open your seam. With bias tape on bottom, sandwich one seam edge in one fold, and the other seam edge into the opposite fold. Pin the opposite side, and stitch down the unpinned. You can pin both, but unless I'm working with limp fabric, I haven't found this necessary. (Full disclosure, I can't find my old cardboard lengths, so I'm um, eyeballing it.) After sewing each seam edge into the tape, you can sew again down the center from the right side of the garment, right in the seam stitching. Yet again, I don't bother with this unless it's particularly limp, shifty fabric.
I've done one of these for an 1/8" seam allowance, and that was some annoyingly tight stitching; but it saved the whole project. I recommend a zipper foot, if your machine uses a wide straight stitch foot. My electric machine does, and it's really hard to see what you are doing around that massive foot.
Bias or grain tape would be decided by the type of seam. Curved, gusseted, flared seams, do a bias tape. Straight seams, grain line cut tape is fine. I never called it tape before, but that's the correct term for those lengths of seam binding bits cut from the scraps and leftover sections. It most often comes from any similar fabric type's scraps, and leftovers.
*will be adding better pictures to explain*
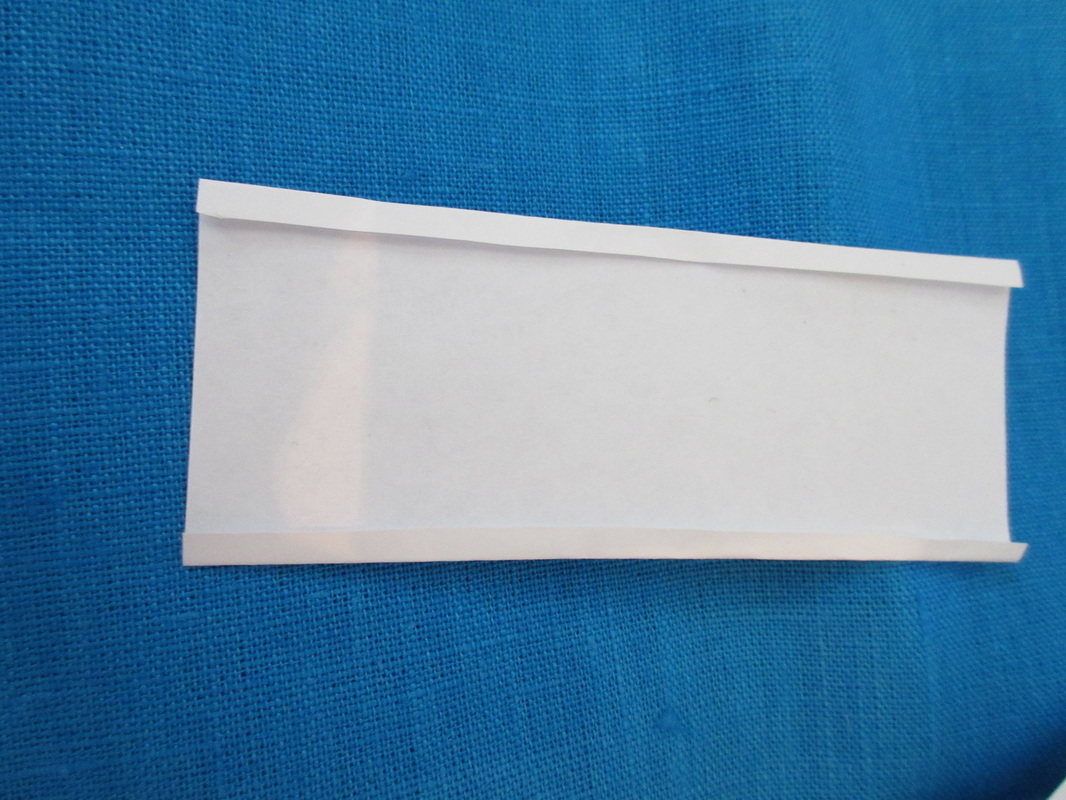
Fold over 1/8" on each side of the tape, and iron down.
Fold those over again 1/4". Iron. (Looks a bit wobbly from this angle, but the idea is an evenly spaced set of folds.)
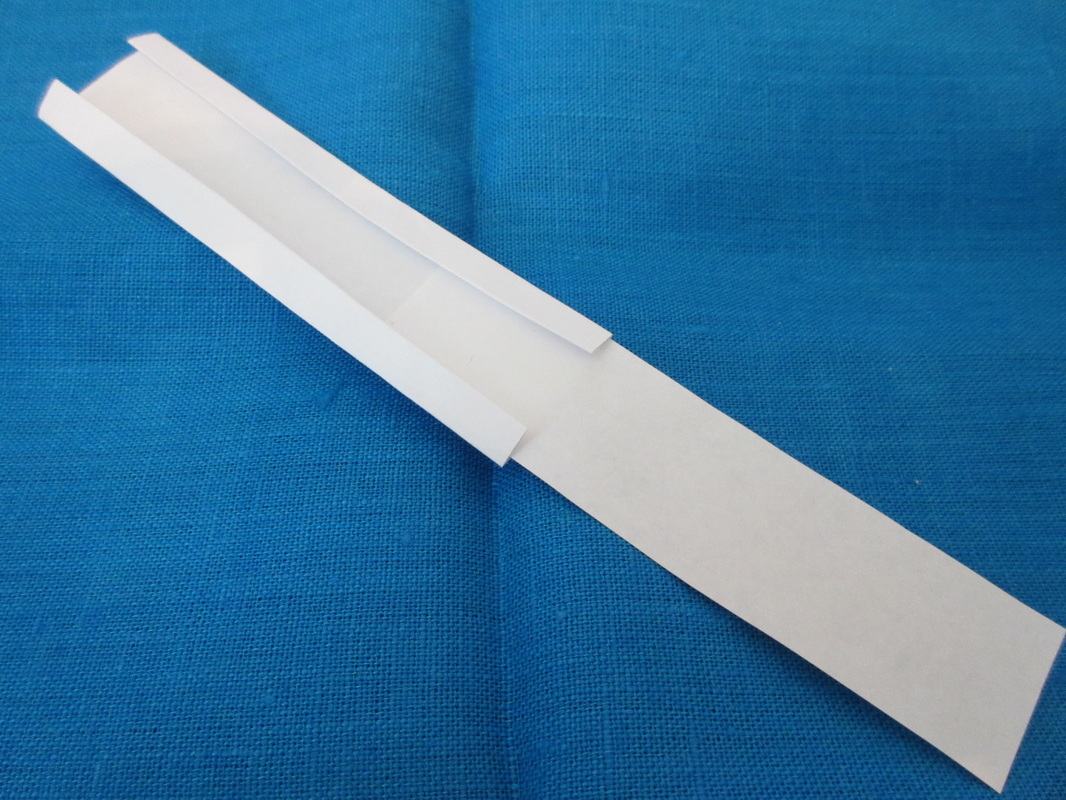
Insert ironed open seam into tape. (Notice- these photos are of paper 'tape' and 'seam'. So the seam is way easier to 'insert', than one on a garment, but hopefully it shows the idea. For now.)
I've been trying out the flat felled, and mock flat felled, seams. My opinion, those are for work clothes, only. The benefit I see is that there is no seam movement during wear, because the whole thing is sewn down. However, you can see that entire bulky seam, from the outside. If your stitching was at all rushed, it may look even more unappealing.
I do actually like a seam finish that involves hand sewing, because it's nice to be able to continue a conversation during a visit; but still start getting the day's work done too. Biggest drawback of machines is still the racket they make during operation. Treadles are much quieter, but only a fairly boisterous conversation will work properly, while running one of those. Problem is a hand seam takes almost twice as long, or more, and I end up with sore fingers. I like it because the seam finish is soft, and secure, with little bulk.
I do actually like a seam finish that involves hand sewing, because it's nice to be able to continue a conversation during a visit; but still start getting the day's work done too. Biggest drawback of machines is still the racket they make during operation. Treadles are much quieter, but only a fairly boisterous conversation will work properly, while running one of those. Problem is a hand seam takes almost twice as long, or more, and I end up with sore fingers. I like it because the seam finish is soft, and secure, with little bulk.
 RSS Feed